B-U585I-IOT02A
Rev.C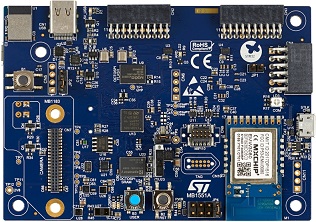
-
Core
Cortex-M33
-
Debug interface
ST-Link
-
Device
STM32U585AIIx -
CMSIS Pack
B-U585I-IOT02A_BSP
B-U585I-IOT02A Discovery kit for IoT node
Overview
The B-U585I-IOT02A Discovery kit provides a complete demonstration and development platform for the STM32U585AI microcontroller, featuring an Arm Cortex-M33 core, 2 Mbytes of Flash memory and 786 Kbytes of SRAM, as well as smart peripheral resources. This Discovery kit enables a wide diversity of applications by exploiting low-power communication, multi way sensing, and direct connection to cloud servers.
It includes Wi-Fi® and Bluetooth® modules, as well as microphones, temperature and humidity, magnetometer, accelerometer and gyroscope, pressure, time-of-flight, and gesture-detection sensors.
The support for ARDUINO® Uno V3, STMod+, and Pmod™ connectivity provides unlimited expansion capabilities with a large choice of specialized add-on boards. The on-board STLINK-V3E debugger provides out-of-the-box debugging capabilities, as well as a USB Virtual COM port bridge.
Getting started
ST-LINK driver installation and firmware upgrade (on Microsoft Windows)
- Download the latest ST-LINK driver.
- Extract the archive and run
dpinst_amd64.exe. Follow the displayed instructions. - Download the latest ST-LINK firmware upgrade.
- Extract the archive and run the
ST-LinkUpgrade.exeprogram. - Connect the board to your PC using a USB cable and wait until the USB enumeration is completed.
- In the ST-Link Upgrade program, press the Device Connect button.
- When the ST-LINK driver is correctly installed, the current ST-LINK version is displayed.
- Press the Yes >>>> button to start the firmware upgrade process.
WiFi firmware update for MXCHIP EMW3080B (on Microsoft Windows)
- Connect the board to your PC using a USB cable and wait until the USB enumeration is completed.
- Start the Serial Terminal application and connect to the STMicroelectronics STLink Virtual COM Port (COMx) (115200-8-N-1).
- Download the latest MXCHIP EMW3080B firmware.
- Extract the archive.
- Drag and drop the
EMW3080update_B-U585I-IOT02A-RevC_V2.3.4_SPI.binfile, located in the./V2.3.4/SPIsubfolder, to the MBED microcontroller USB Device that shows up in the File Explorer asDIS_U585AIfor TrustZone disabled device or asNOD_U585AIfor TrustZone enabled device. - After file is copied to the MBED microcontroller USB Device the chip will restart and there will be some text message in the Serial Terminal similar to below:
    ################### Welcome to EMW3080 firmware update utility 1.1.0 for board RevB or RevC ###################

    STM32> Configured for MXCHIP embedded FW ST-EMW3080B_V2.3.4_SPI.OTA.BIN 0x8000234 / 686672 bytes
    STM32> Push the user button (Blue) to program the EMW3080 device or enter command
    STM32> MCU system clock 160 MHz, Uart Baud rate 921600, Software emulated UART bit duration 173 cycles


    "      help"            print this message
    "      boot"            boot EMW3080 (needed before using mx command)
    "        mx"            mx [cmd]: send command to mxchip device (cmd which requires ymodem protocol can't be used)
    "     flash"            flash mxchip firmware (same as pushing the blue button)
    "     check"            check mxchip firmware
    .[12hSTM32>
- Type
flashand press Enter, now wait for process to finish, the text in the Serial Terminal should look similar to below:
    STM32>
    STM32> Boot done successfully
    STM32> Waiting for the EMW3080 to be ready for programming (a few seconds pass before receiving a message)
    Transfering packets ...
    CCCCCCCCCCC ... CCCCCCC
    STM32> Programming successful, reset the device to get back to prompt
- Power-off and power-on the board which now has updated MXCHIP EMW3080B firmware.