EVK-MIMXRT1064_MDK
Rev.A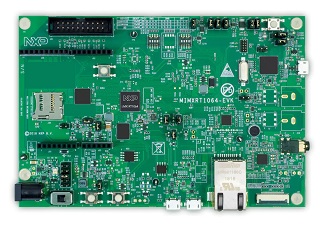
-
Core
Cortex-M7
-
Debug interface
JTAG/SW
-
Device
MIMXRT1064DVL6A -
CMSIS Pack
MIMXRT1064-EVK_BSP
NXP MIMXRT1064-EVK
Overview
The i.MX RT1064 EVK is a 4-layer through-hole USB-powered PCB. At its heart lies the i.MX RT1064 crossover MCU, featuring NXP’s advanced implementation of the Arm Cortex-M7 core. This core operates at speeds up to 600 MHz to provide high CPU performance and excellent real-time response.
Schematics
CMSIS-Drivers
This board support pack contains a CMSIS-Driver for the VIO interface. This is a virtual I/O abstraction for peripherals that are typically used in example projects. The Blinky example uses this interface to create a blinking light with the USER LED mounted on the board that can be controlled by the USER BUTTON (SW8).
| Virtual Resource | Variable | Physical Resource on MIMXRT1064-EVK |
|---|---|---|
| vioBUTTON0 | vioSignalIn.0 | WAKEUP (USER_BUTTON) |
| vioLED0 | vioSignalOut.0 | GPIO_AD_B0_09 (USER_LED) |
Refer to the schematics for board connection information.
CMSIS-DAP Firmware
Make sure that you have updated your CMSIS-DAP firmware to the latest version. This makes the board compatible with Keil Studio Cloud that enables browser-based project creation and debugging.
Download the following CMSIS-DAP firmware from NXP: DAPLink v0246
Flashing instructions for Windows users
- While holding down the boards reset button, connect the boards USB debug port to the computer. It should enumerate and mount as MAINTENANCE.
- Drag-and-drop the firmware file onto the mounted drive.
- Wait for the file copy operation to complete.
- Power cycle the board. It will now enumerate and mount as DAPLINK or the name of the board.
Flashing instructions for Linux users
- While holding down the boards reset button, connect the boards USB debug port to the computer. It should enumerate as MAINTENANCE.
- In a terminal execute
cp <path to firmware file> <MAINTENANCE> && sync
Note: make sure to change MAINTENANCE to the name of the mount point of the drive on your system. - Power cycle the board. It will now enumerate and mount as DAPLINK or the name of the board.
Flashing instructions for MAC users
- While holding down the boards reset button, connect the boards USB debug port to the computer. It should enumerate as MAINTENANCE.
- In a terminal execute
sudo mount -u -w -o sync /Volumes/MAINTENANCE ; cp -X <path to firmware file> /Volumes/MAINTENANCE/
Note: If your drive does not mount as MAINTENANCE make sure to change this to match the name of the mounted disk attached to your system. - Wait for the file copy operation to complete.
- Power cycle the board. It will now enumerate and mount as DAPLINK or the name of the board.
Self-help for bricked boards
NXP's application note AN13206 - Modifying Debug Firmware on i.MX RT10xx Boards Featuring An LPC4322-based Debug Probe explains how to recover a bricked development board.